Category Archives: Letterpress Tutorials

Duplex Round Two

Duplexing Tutorial Part 2 – Well, as a way of following up my previous post, I’m trying a second method of duplexing – one that fuses printed stocks of two colors. ILet me tell you though, the hardest part of duplexing by hand is the trimming (which is slow because my stack cutter is terrible) and the most tedious part is the gluing. It took me about eight and a half hours to duplex all 400 of these suckers. That doesn’t include the scoring which was another two hours. It’s not something my small press could offer for more than 500 unless they were doubled up in the printing stage. I also strongly suggest only doing this with designs that don’t require hairline alignment to the corners or edges the way this one does. Any minor errors are more obvious with a design like this. If you didn’t read part one see it HERE.

For this method I used the following steps:

1. Print both stocks (obviously) For these one side is 300gsm Crane Lettra and the other is a paper called Colorplan in Azure

Image

2. Just like my last post, I applied my glue with a roller to one sheet. You can see the impression level hereImage

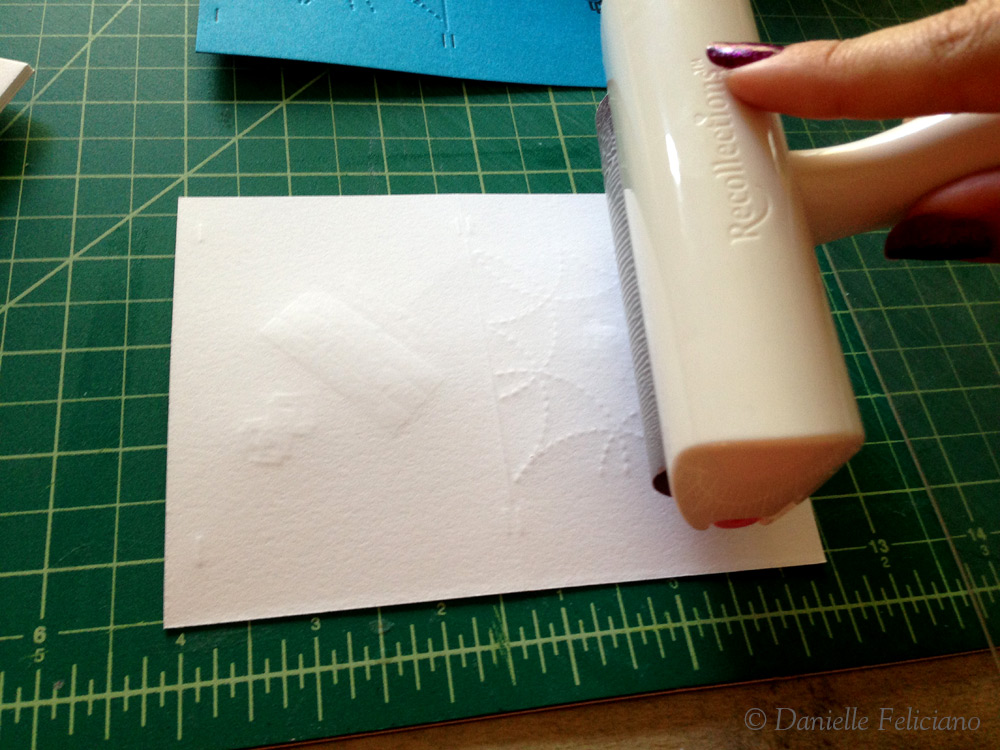
3. I lined up the bottom edge being sure the correct graphic was lining up with the correct back

Image

4. I smoothed them together and there we go. The advantage of this method is that you are completing two cards at once. The disadvantage is that the line up is less sure than the scoring method. I would not offer this method to a client if there were very noticeable elements that would give away a slight hairline misalignment. In this job the bleed on both sides needs to line up with the corners and that was a challenge, but I wanted to test this method with a difficult job to see the limitations.

Image

Image

Image

5. In the end, this method worked nearly as well as the folding method – however it should be noted that this worked so well because the images printed on the white (back side), and the images printed on the blue (front side) are printed in EXACTLY the same spot on the card (which were the same size). If they weren’t, they would need to be cut down to a primary set of guides and then trimmed again once they were glued together. Some came out a bit wonky, but for the most part, both sides lined up properly (below I accidentally photographed a crooked one… so just trust me on that).  Here is the final result:

Carlos Vargas Cards

DSC01702

* The design on these cards is done by Carlos Vargas

Tagged , , , ,

Duplexing

Duplexing Tutorial Part 1 – Things have been very busy at Panthera Press. We’ve been doing some small jobs and have acquired an assistant – Lanny Lesniak. I want to share a recent project that required duplexing two sheets. I found there weren’t a lot of visual resources which explained the process, so I took a few photos and am going to explain how I attempted it this time…

1. I printed the sheets with the back and front on one sheet:

The crop marks are for me to use in the scoring and trimming process.

Image2. I printed the second color which was really just a tinted texture, and added a ‘score’ line. In retrospect, I should have made the score line longer and put it with the first later not the second.

Image

3. Now, on to the actual duplexing – I hand scored each card with a blade using the score line as a guide. I could have (should have) scored on press, but I didn’t have a scoring matrix, and the blade ended up being just fine. I used the crop marks for the black layer, since it was more important that it be square than the subtle blind stamp.

Image

4. Now for the sticky part… I was skeptical about spray glue, because although I could glue many more at a time, I was afraid it would be messy and drip or get on the other sides of the cards. Plus I had poor ventilation, so I went with bookbinder’s PVA and a roller. I rolled the PVA out on a piece of acrylic. It wasn’t necessary to get exactly to the edges since those will get trimmed off, and in the end it was a very neat/clean process.

Image

Image

5. You need to fold the card quickly because the glue is in a thin layer which dries fast. I then used a clean brayer to smooth it out (a bone folder works too, but is more tiring and a bit slower). The heavy weight of the paper and the light layer of glue made this step almost superfluous.

Image6. Finally, I trimmed them on my stack cutter. Even though sometimes the fold appeared a bit crooked in how it overlapped at the edges- because I scored by hand, I knew one edge was sure/straight and lined up to that side first. In the end, they all cut straight and correctly.

Image

Image7. At last, duplexed cards, and they came out pretty well. Here you can see some different versions as I played with how to tint the ‘blind stamp’ web part of the design (which is by Carlos Vargas BTW). I don’t imagine it would be very different if you were doing two different stocks. Instead of just folding it over you’d print each side separately. The difference would be that I would trim them down to a set of crop marks, duplex them, and then trim them again to size so they would be seamless.

Image

Image

Check out part two of this post HERE

Tagged , , , , ,